Set Up Outgoing Mail ID/Sender Mail
Navigation
Go to Home > Settings > Company Details > Edit.

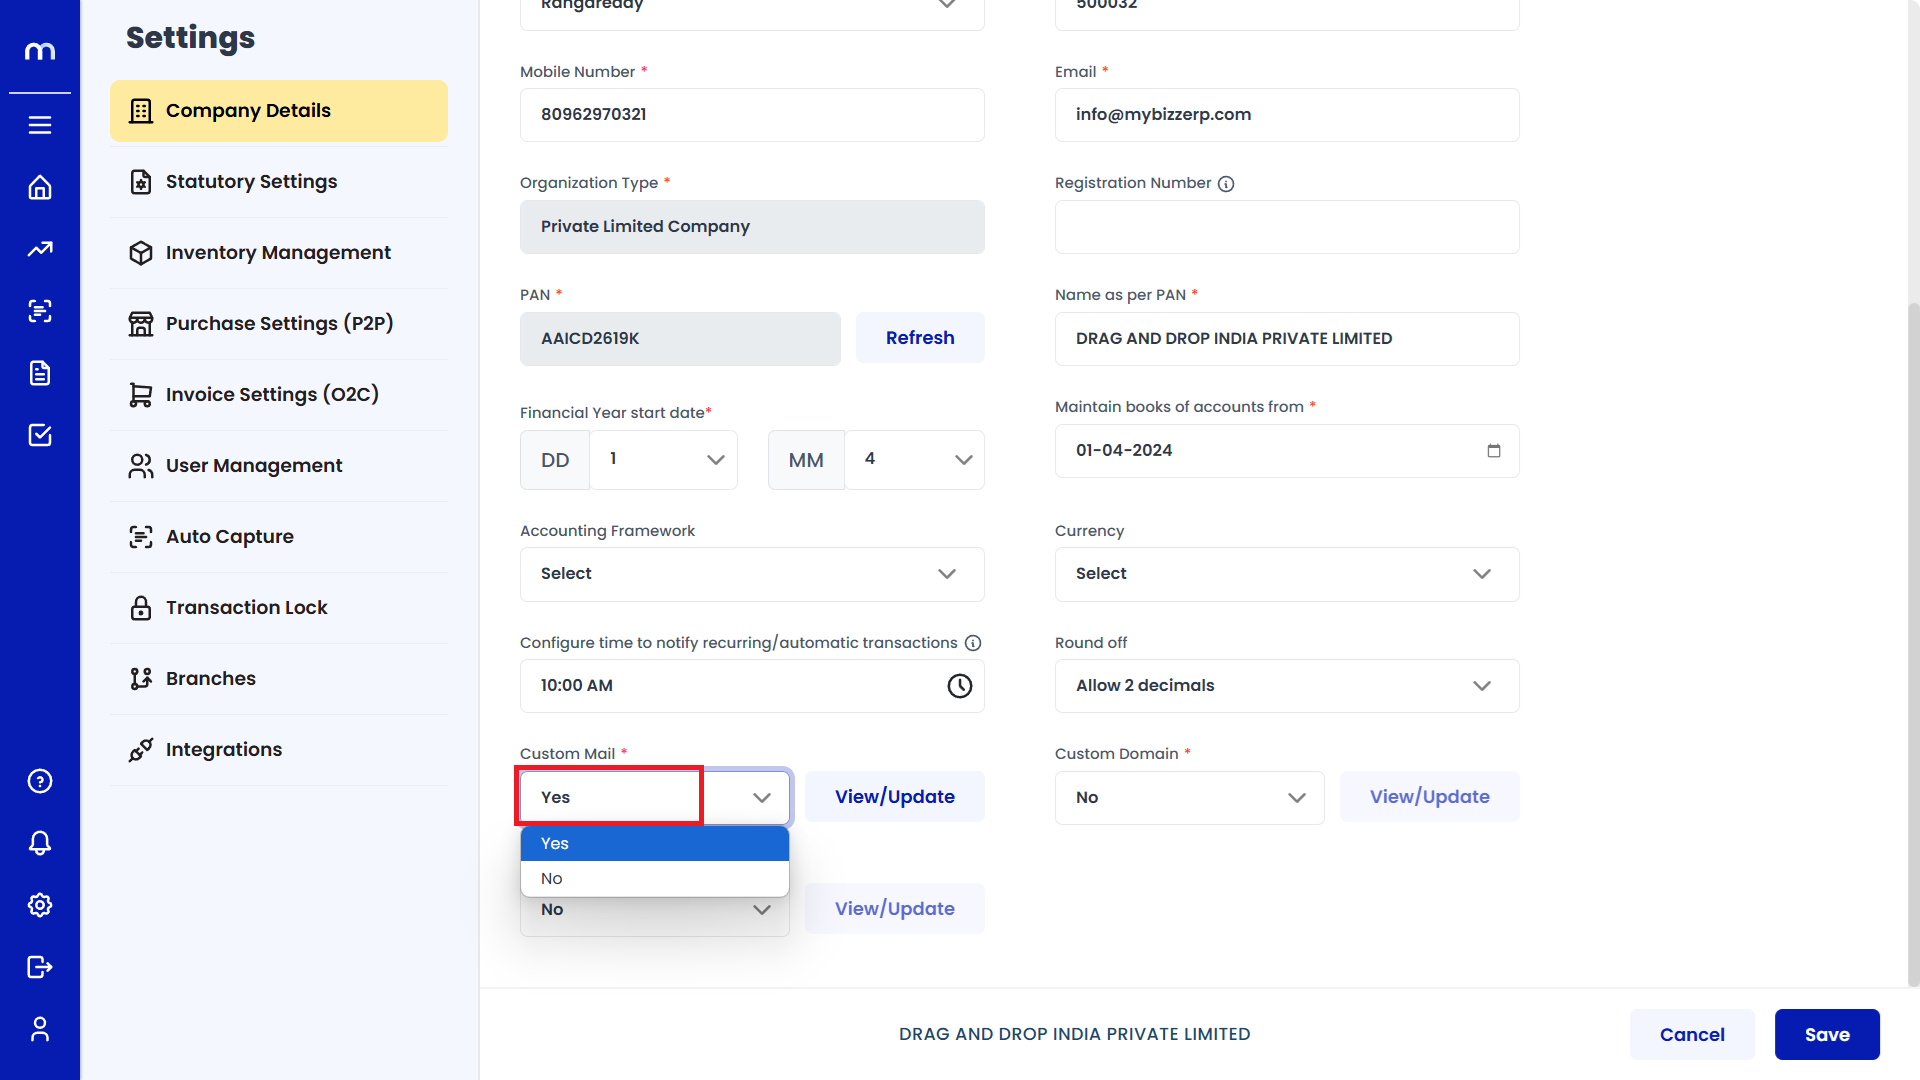
On the Company Details page, locate the Custom Mail select on yes.
Select on Yes.
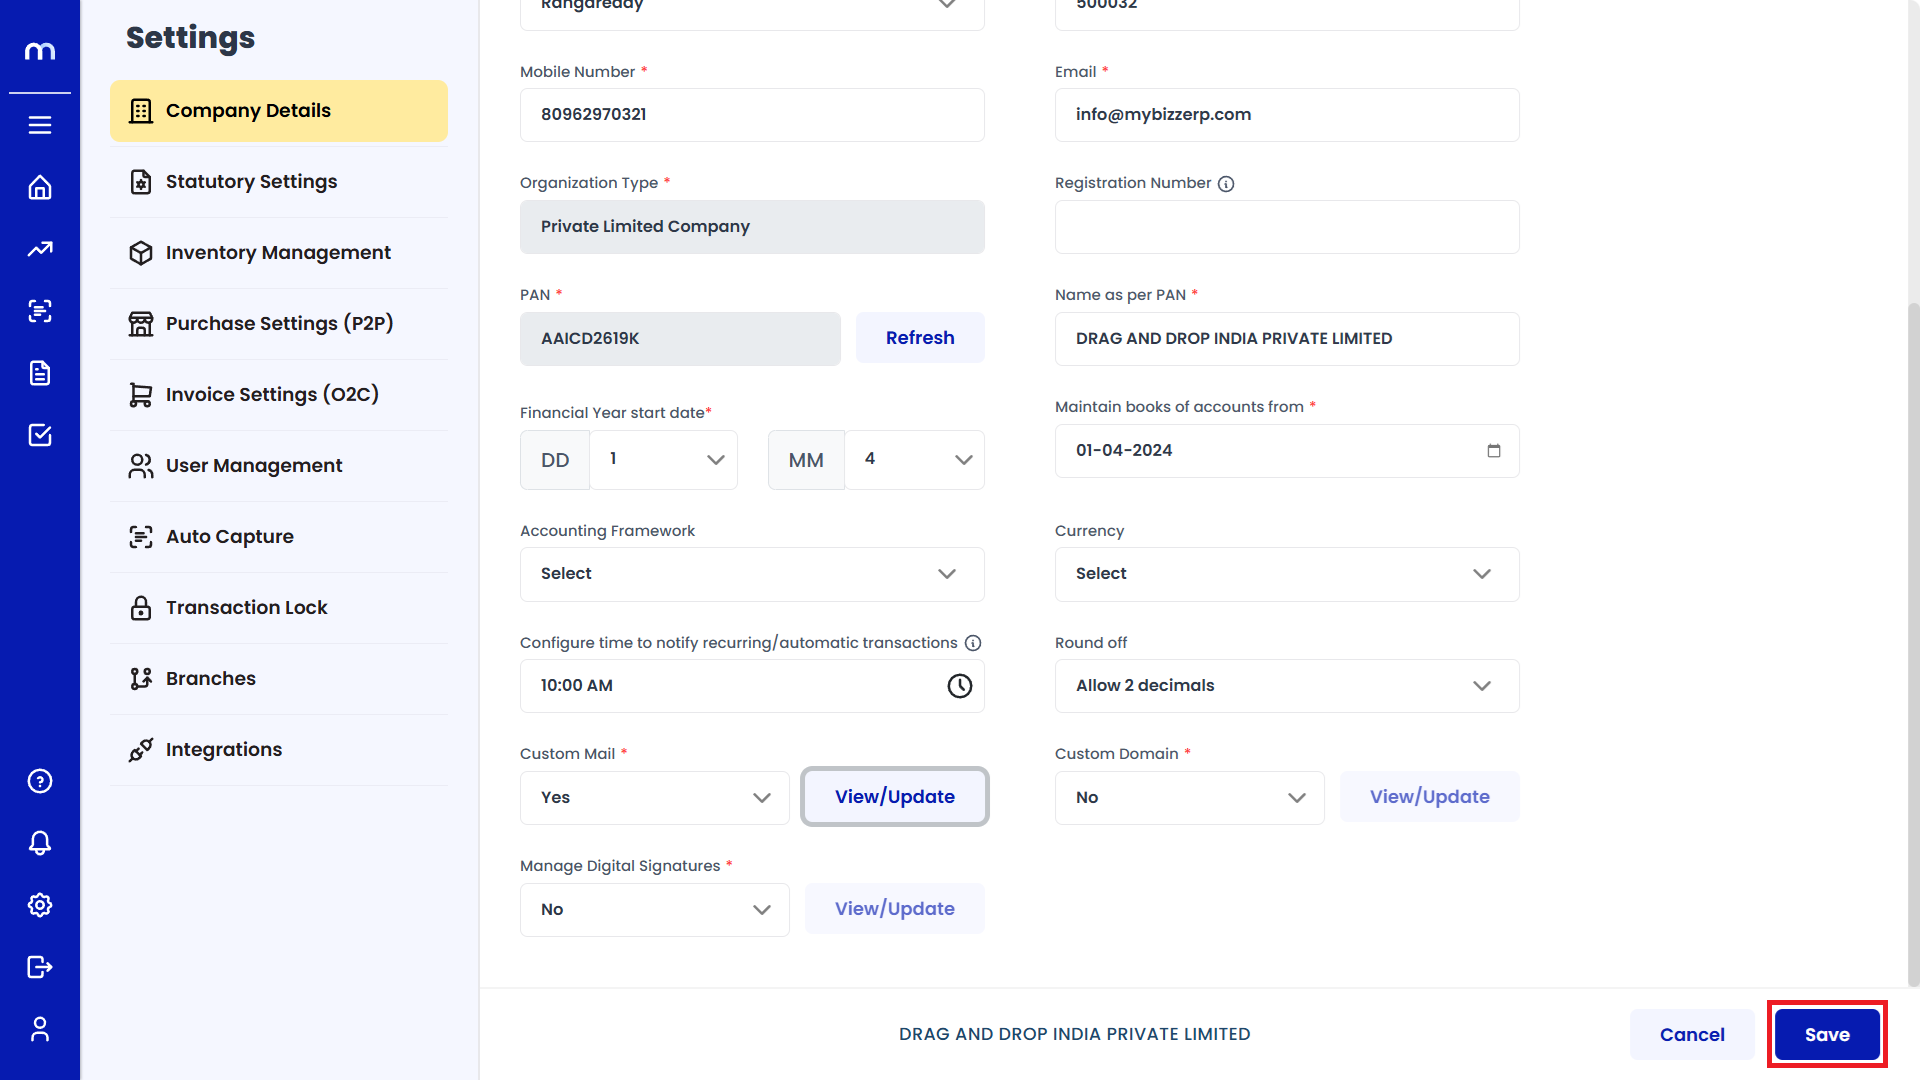
Click on save
Click on Save.
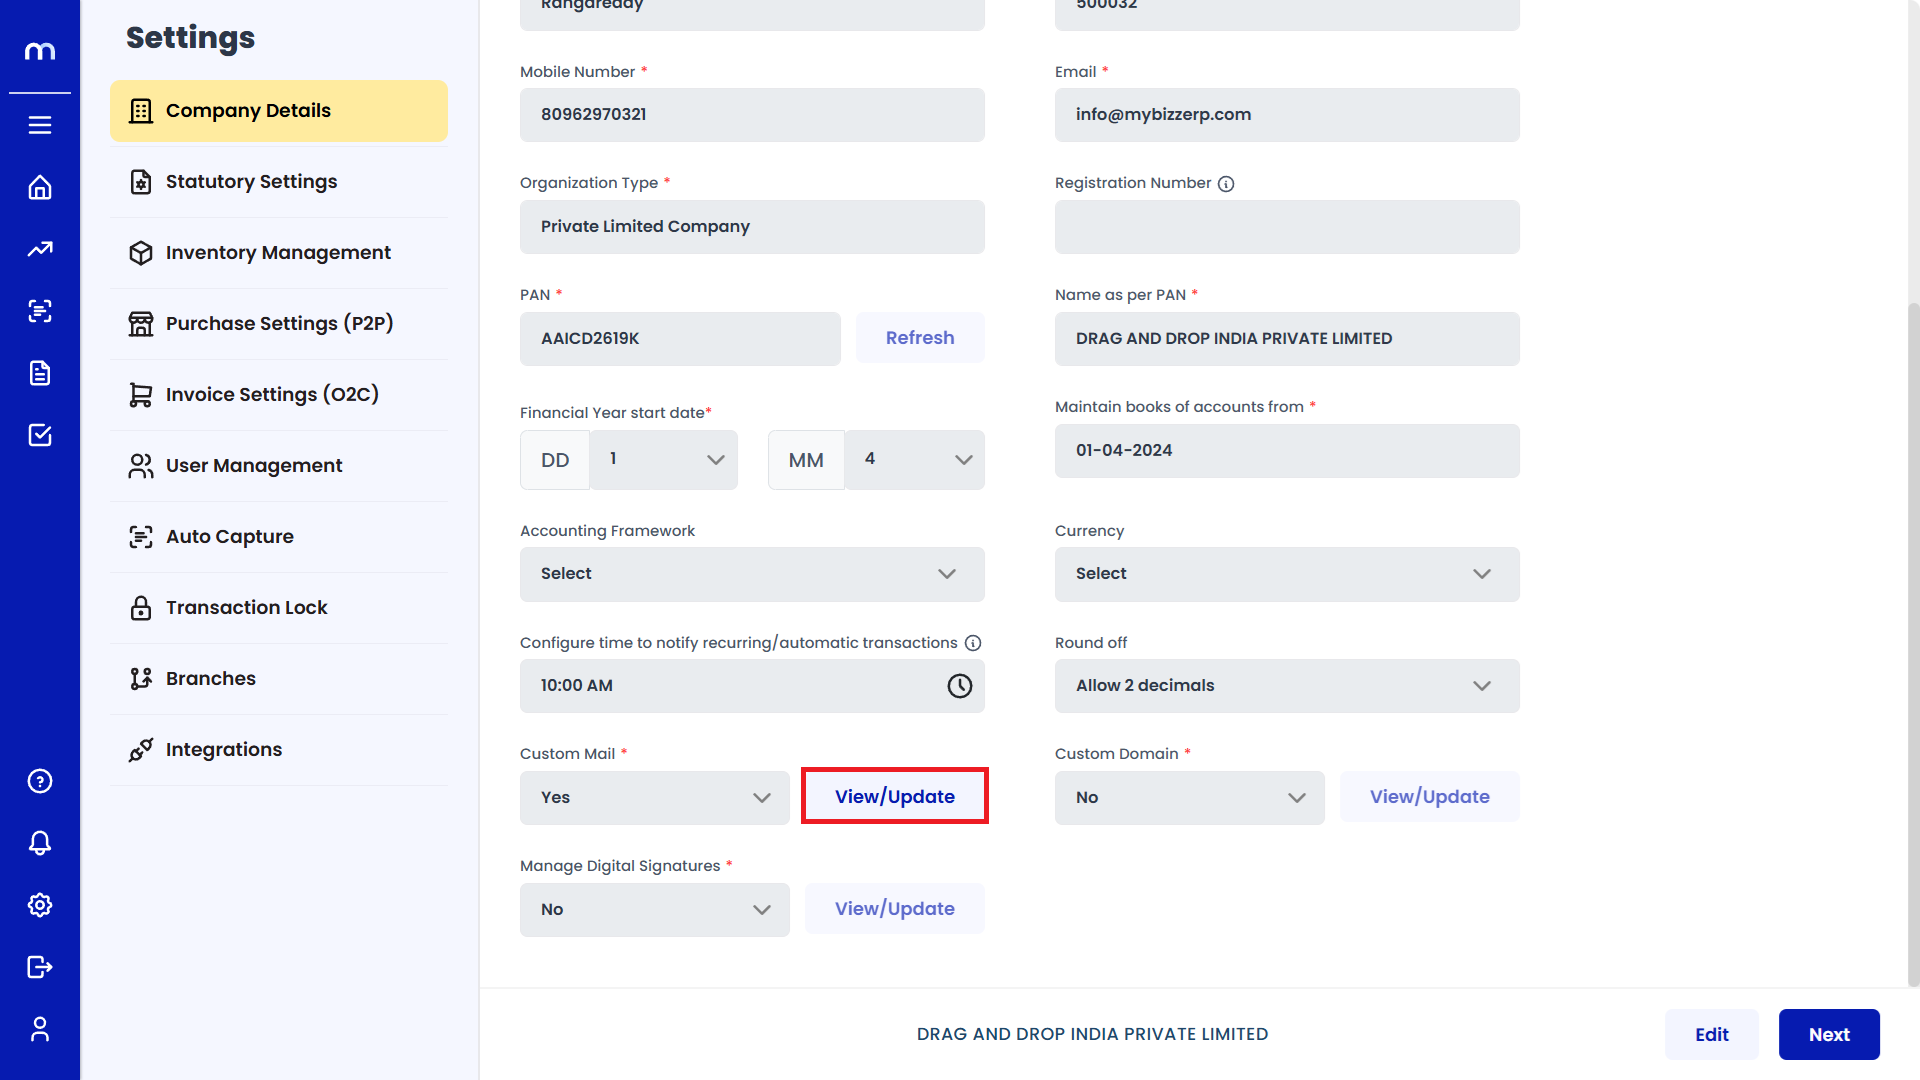
Click on the View/Update button next to Custom Mail.
Click on View/Update.
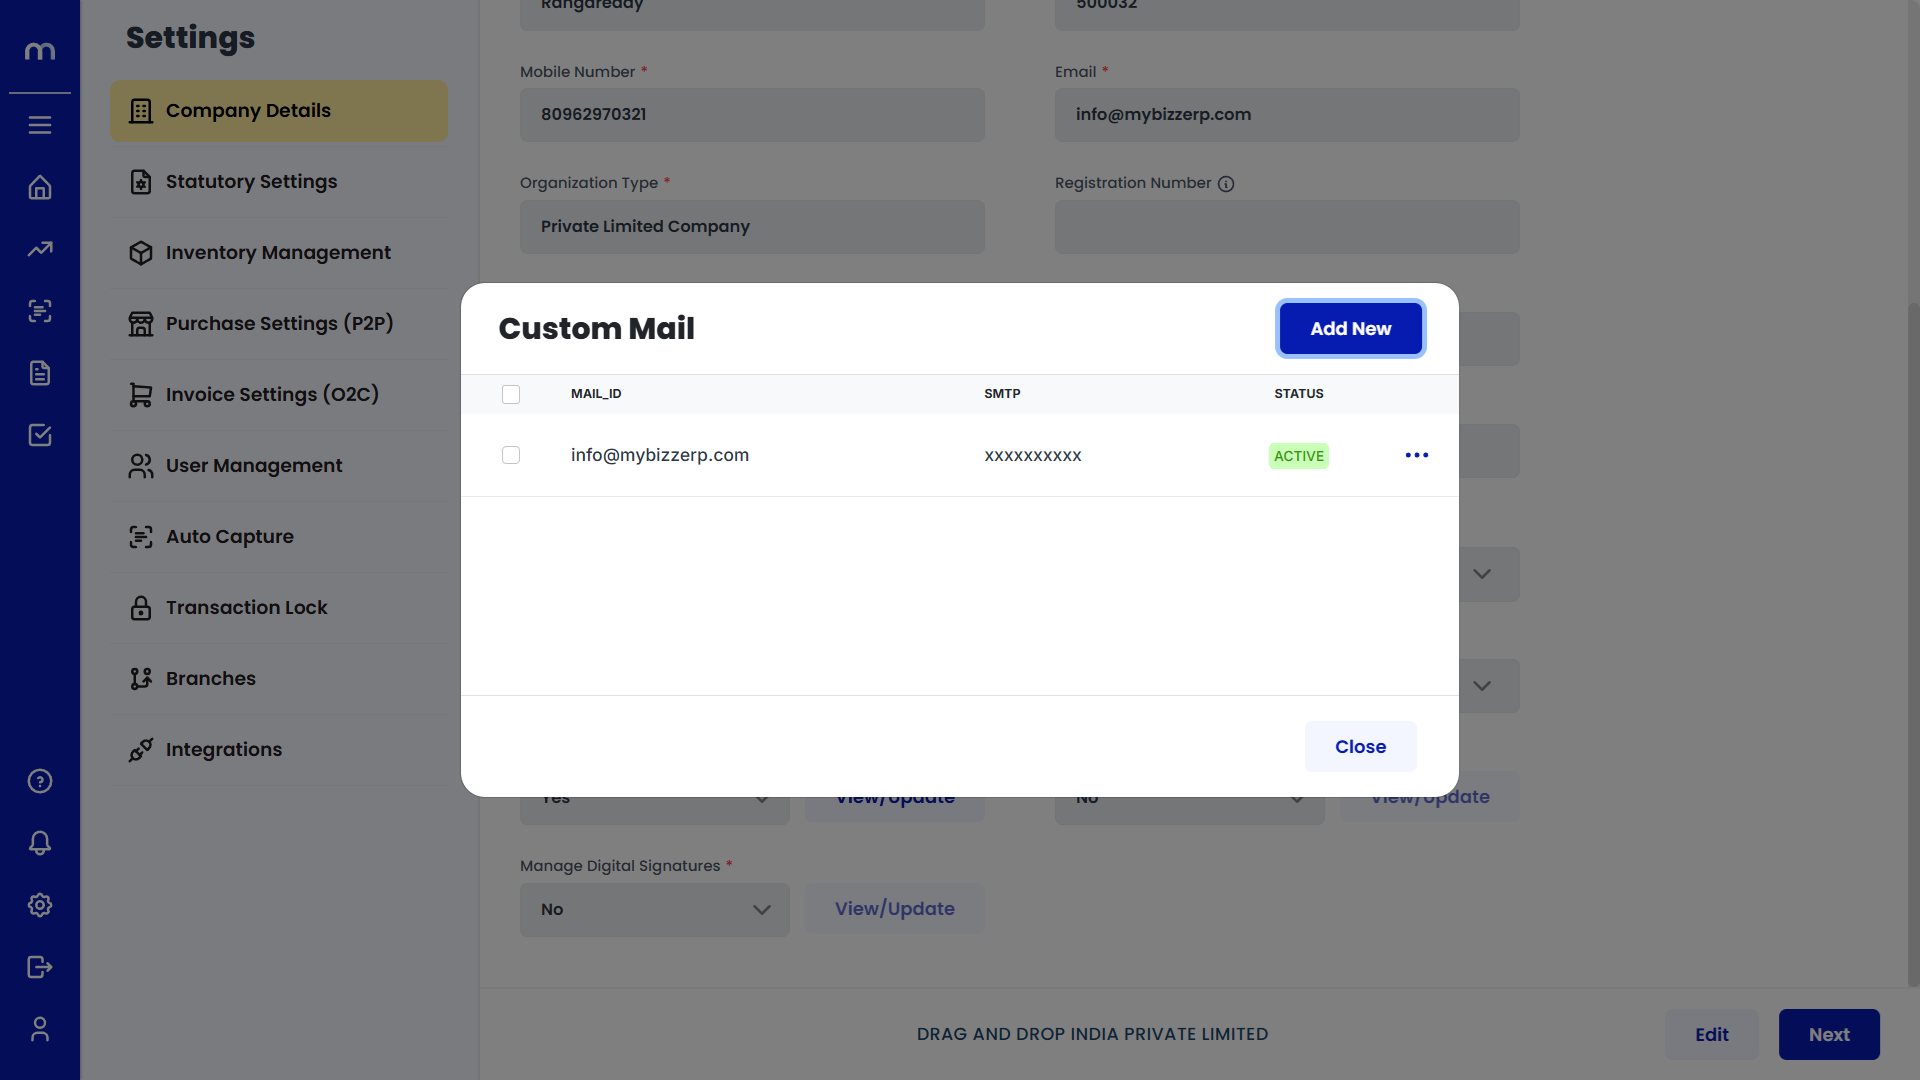
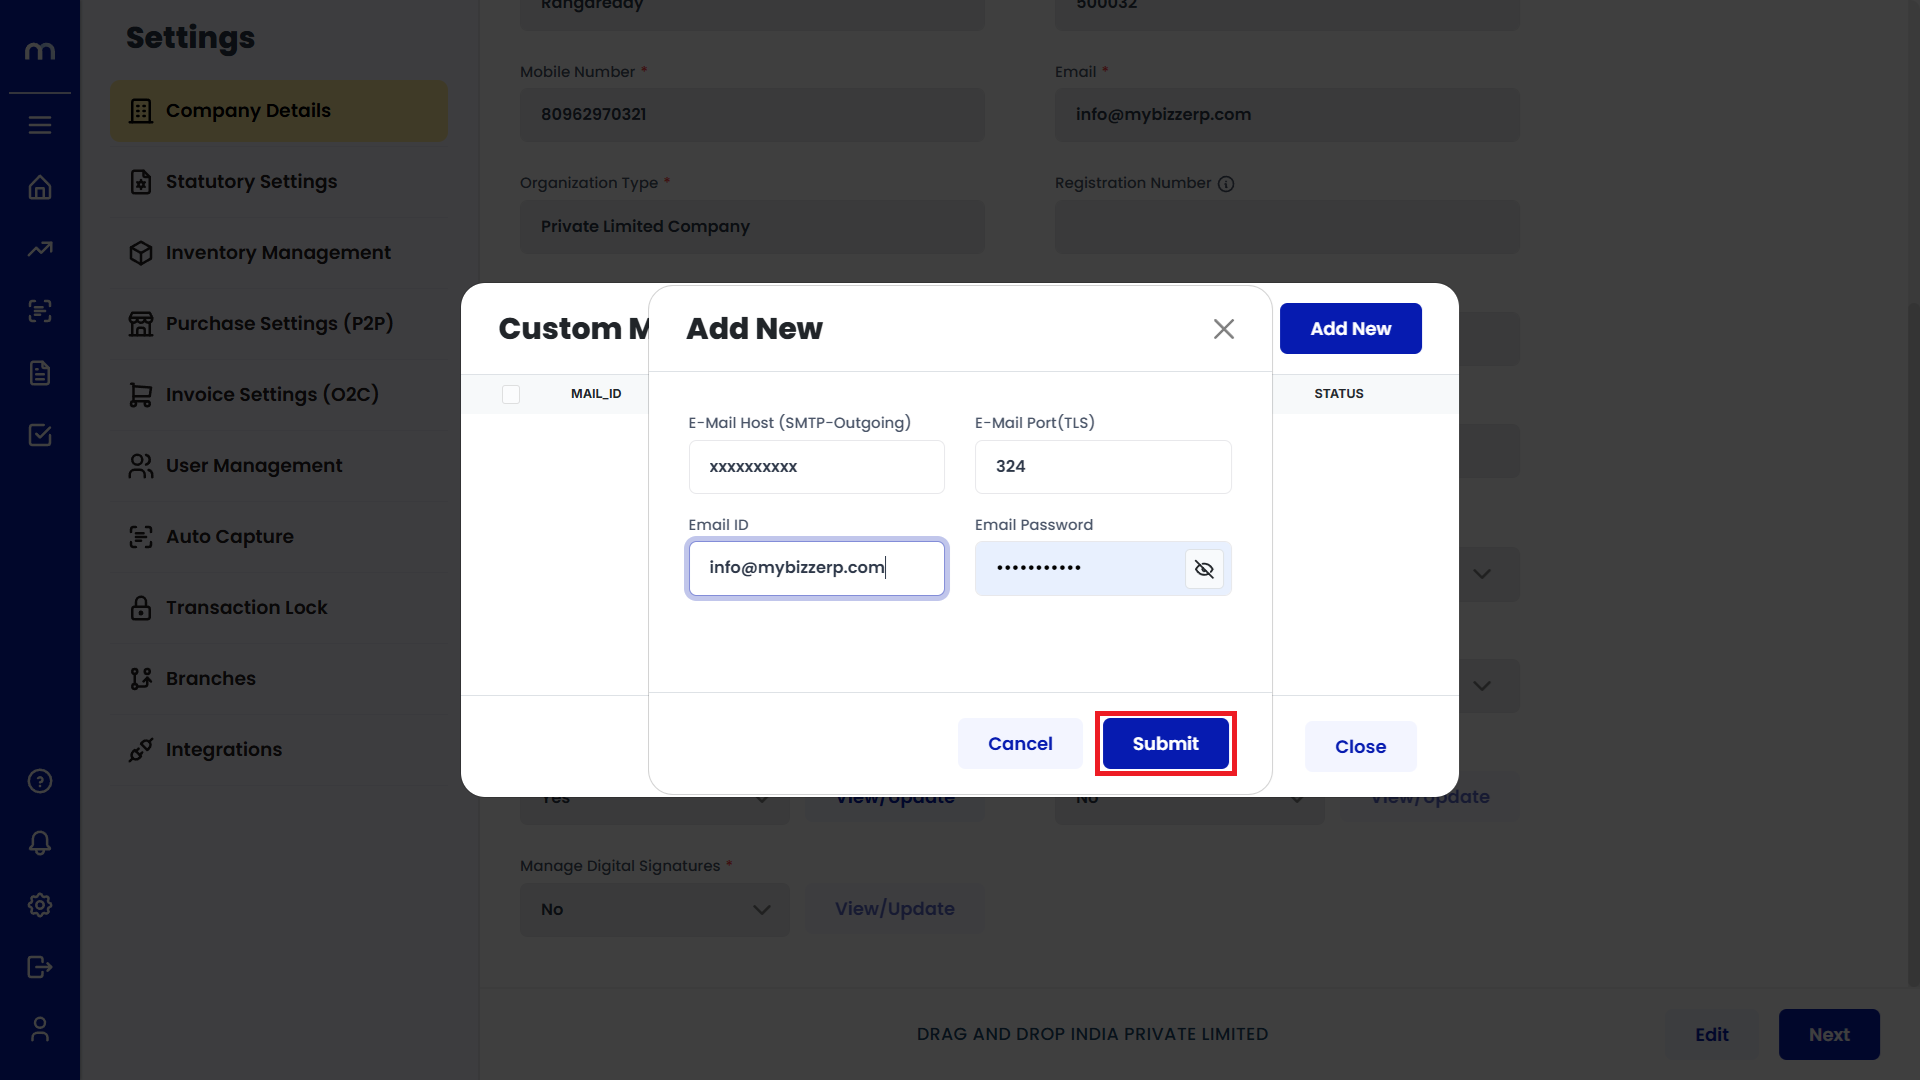
Click on add new
Click on Add New

G-mail Integration
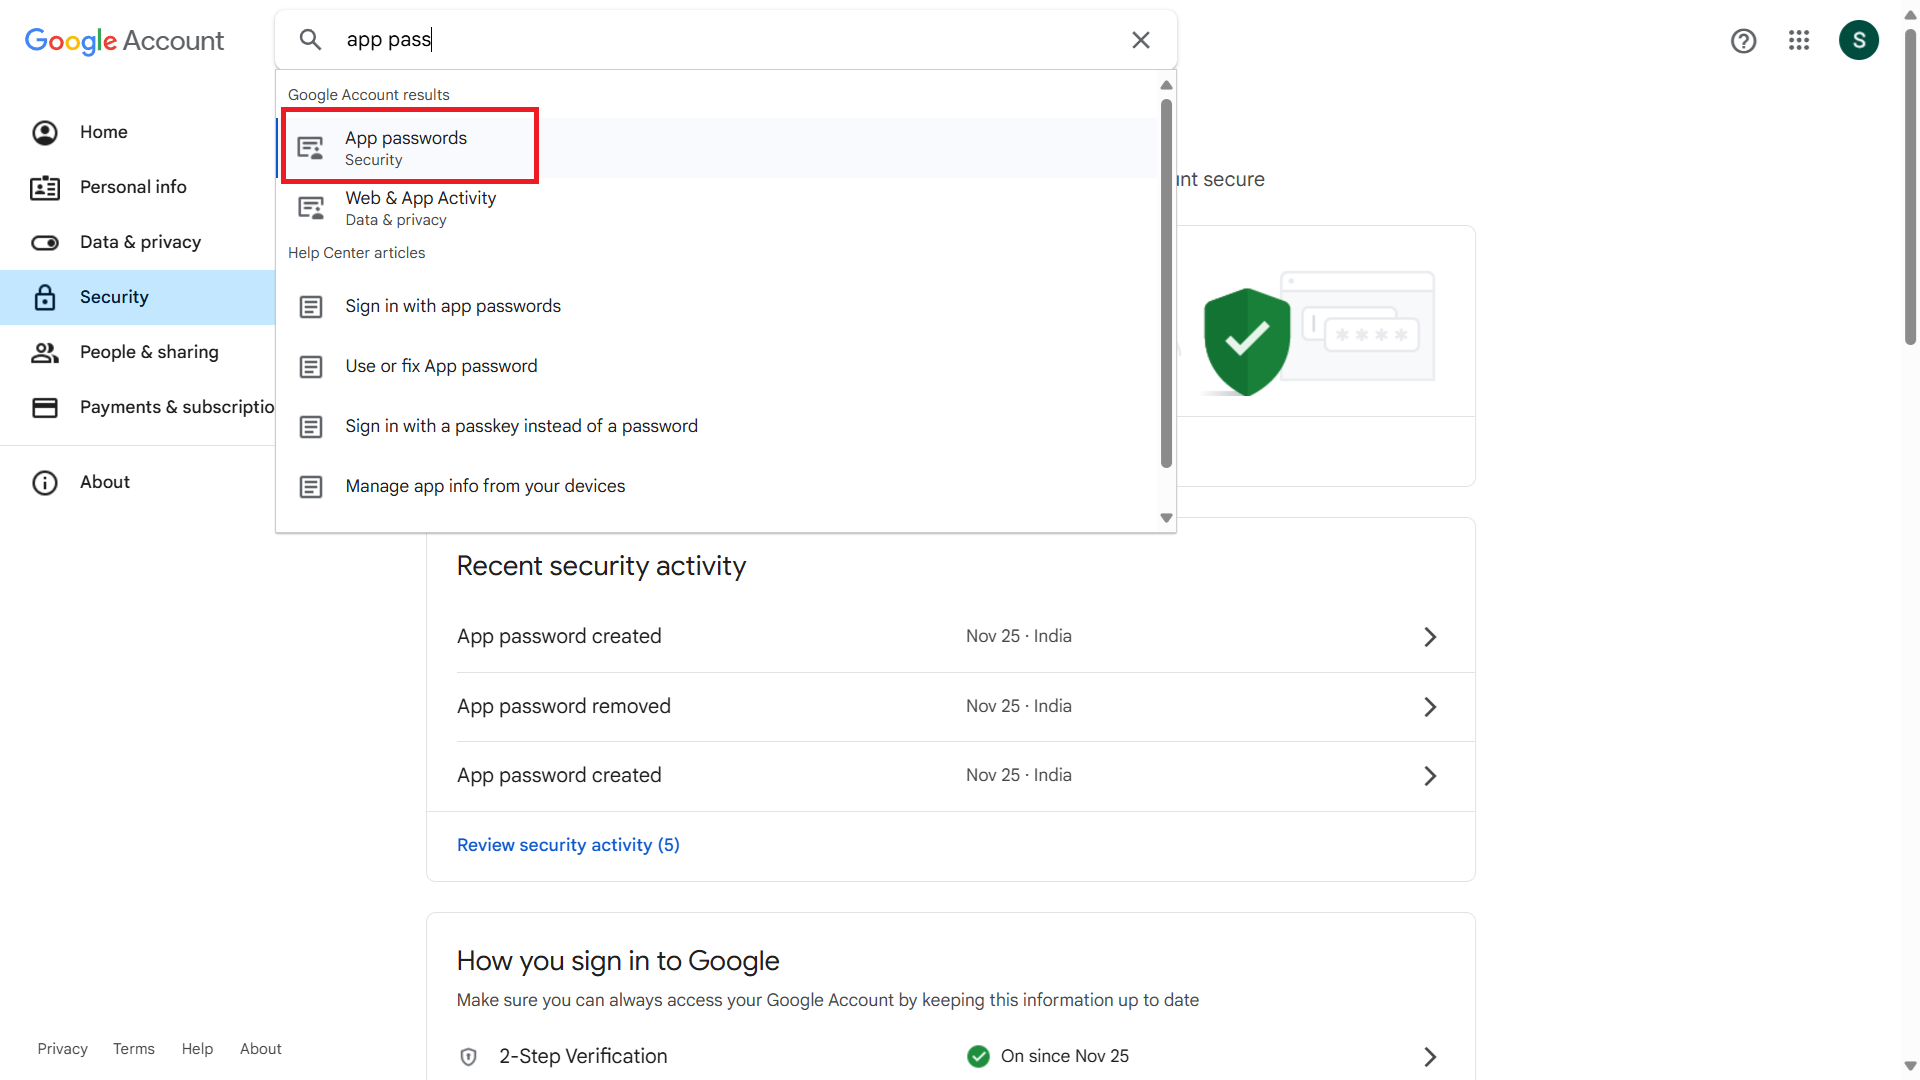
Go to Security in your Google Account.Under the Signing in to Google section, Search for App Passwords. Then click on App Passwords.
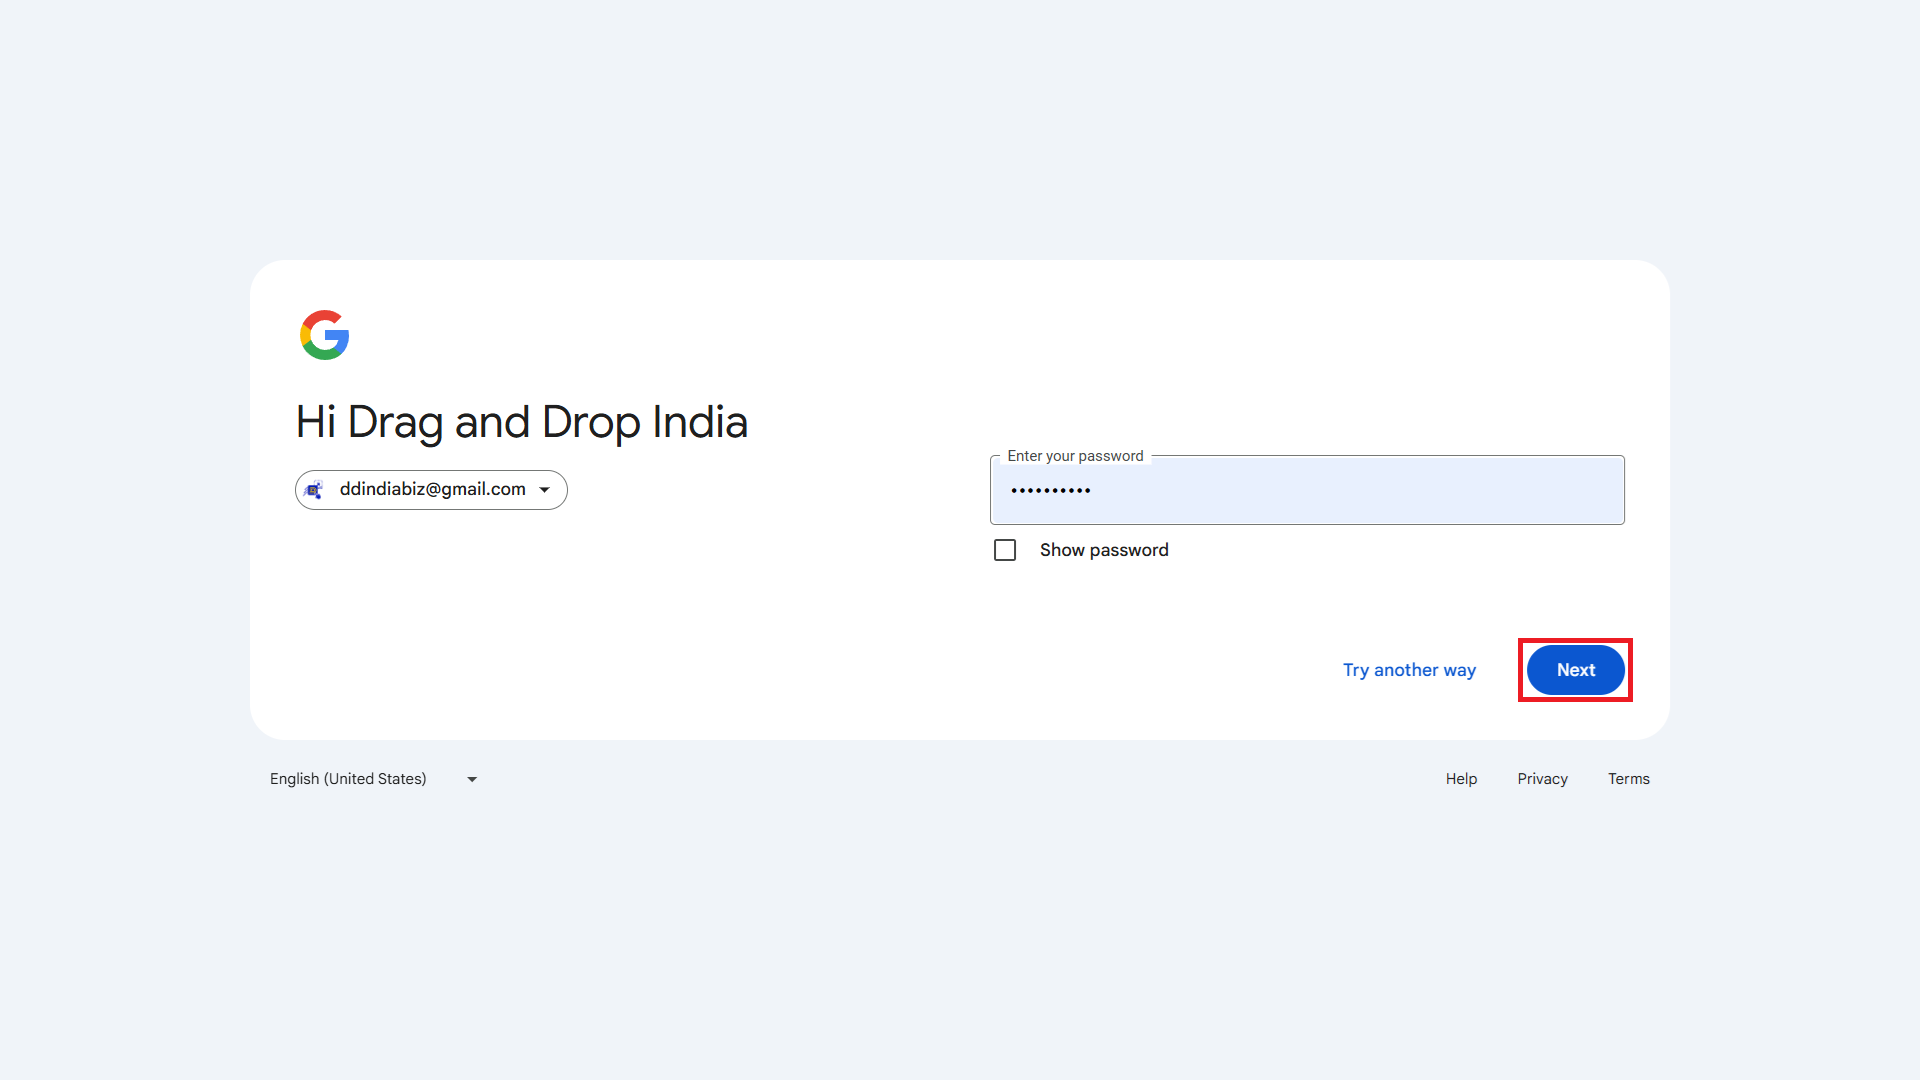
Click on Next
Google will prompt you to log in again for security, Enter your Gmail Password and Then click on Next button.
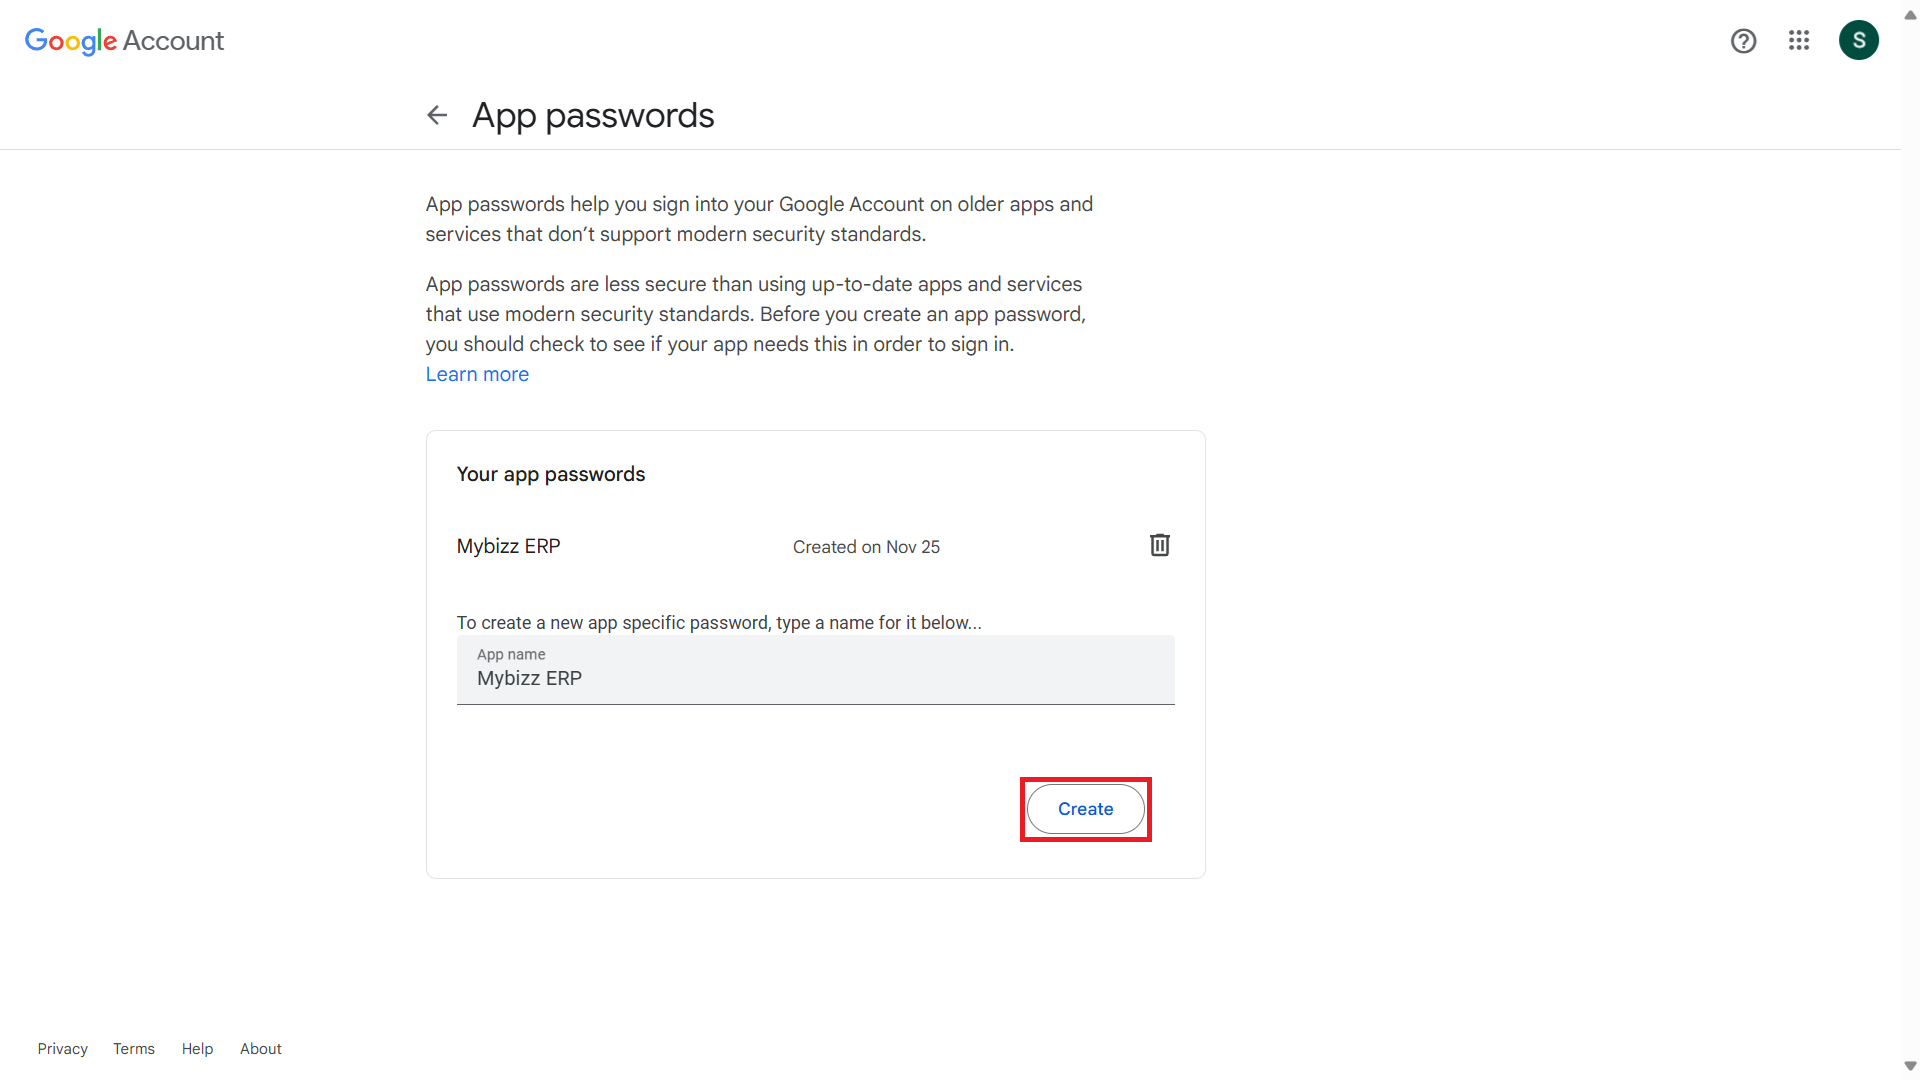
Select App Name
From the dropdown menu, Enter the Custom App Name and Click on Create button.
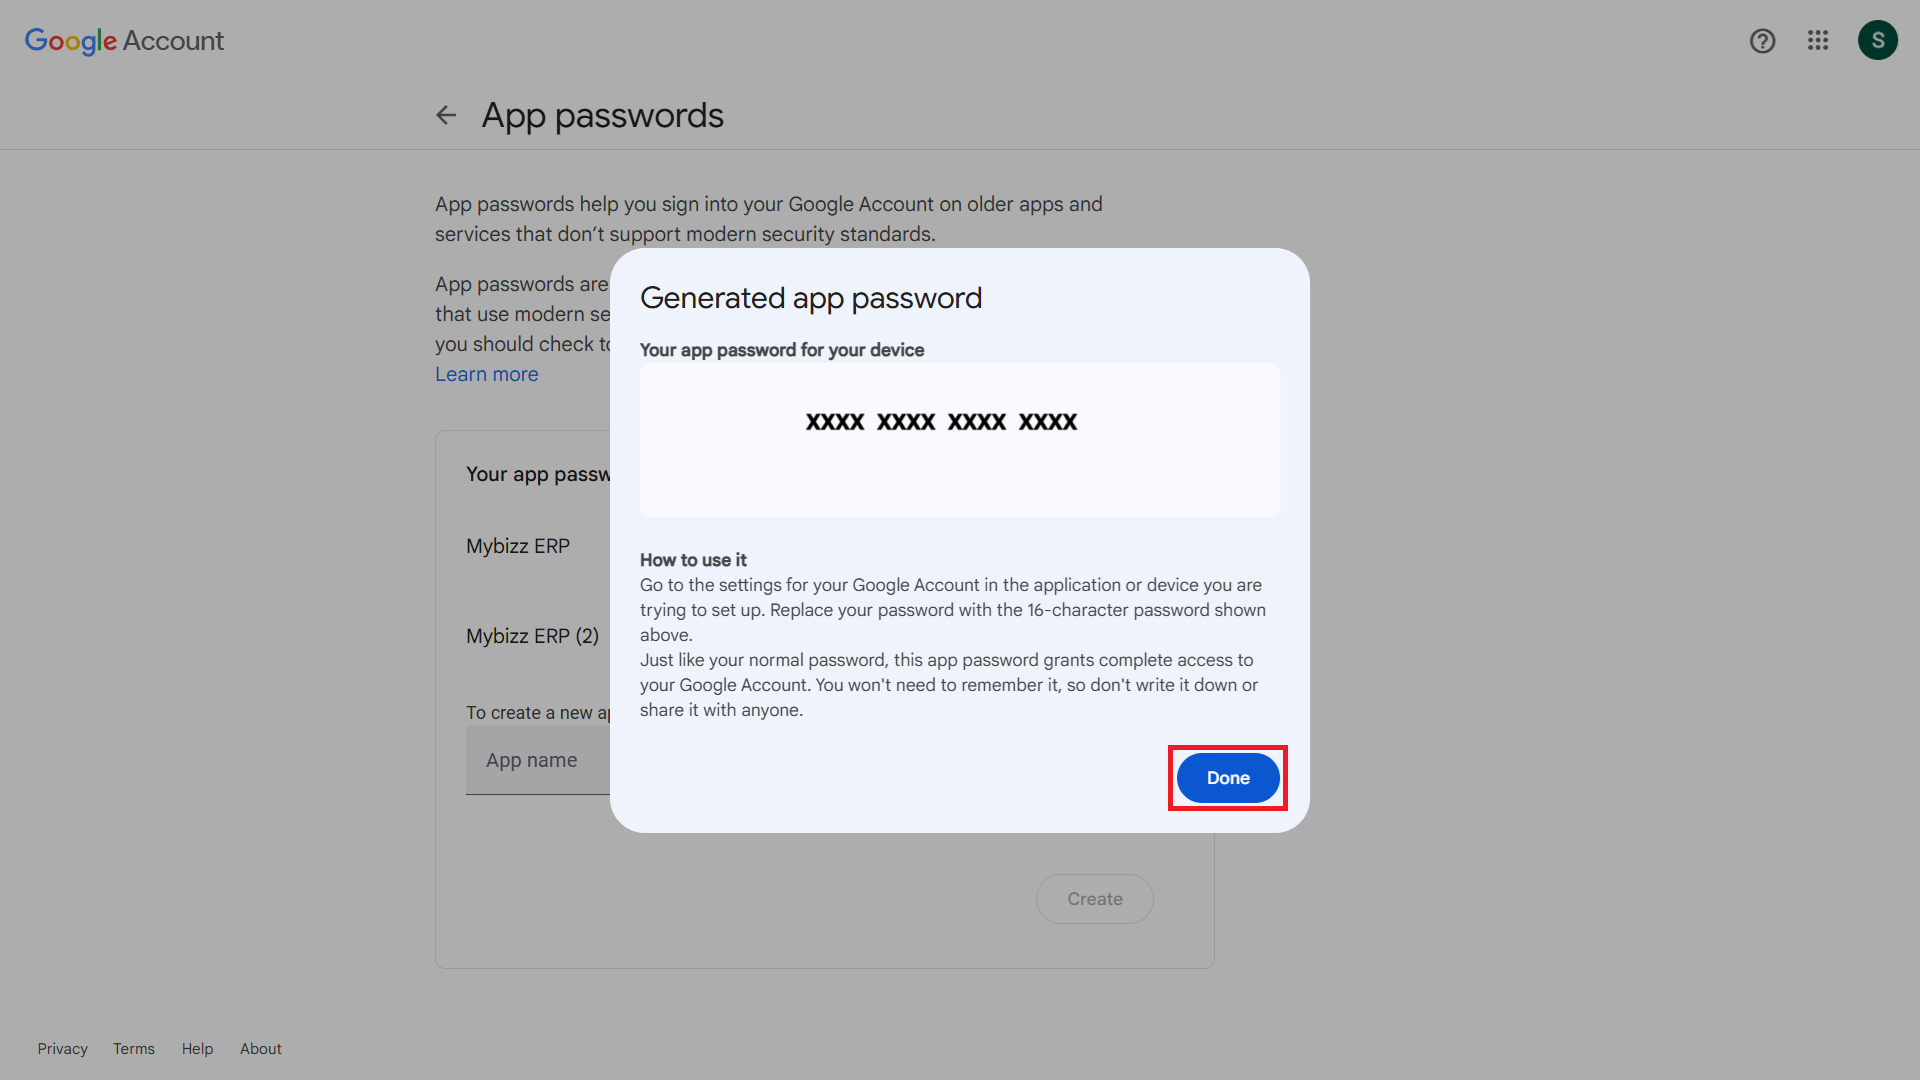
Click on Done
Google will provide a 16-character App Password and Click on Done button. Use the App Password in Your Application.
A new dialog box will open. Here, enter the desired outgoing mail ID or sender email address.
Enter Outgoing mail ID or Sender Email Address
After entering the email ID, click on Submit to confirm the change.
Click on submit
You may be asked to confirm via an email verification process. Complete this if prompted.